Getting Started with SWAPP: A Step-by-Step Guide to Mapping Your Outreach
Welcome to the world of efficient church outreach! If you're new to the Soulwinning APP (SWAPP), this blog post will walk you through the essential first steps of using the app effectively for your church's outreach activities.
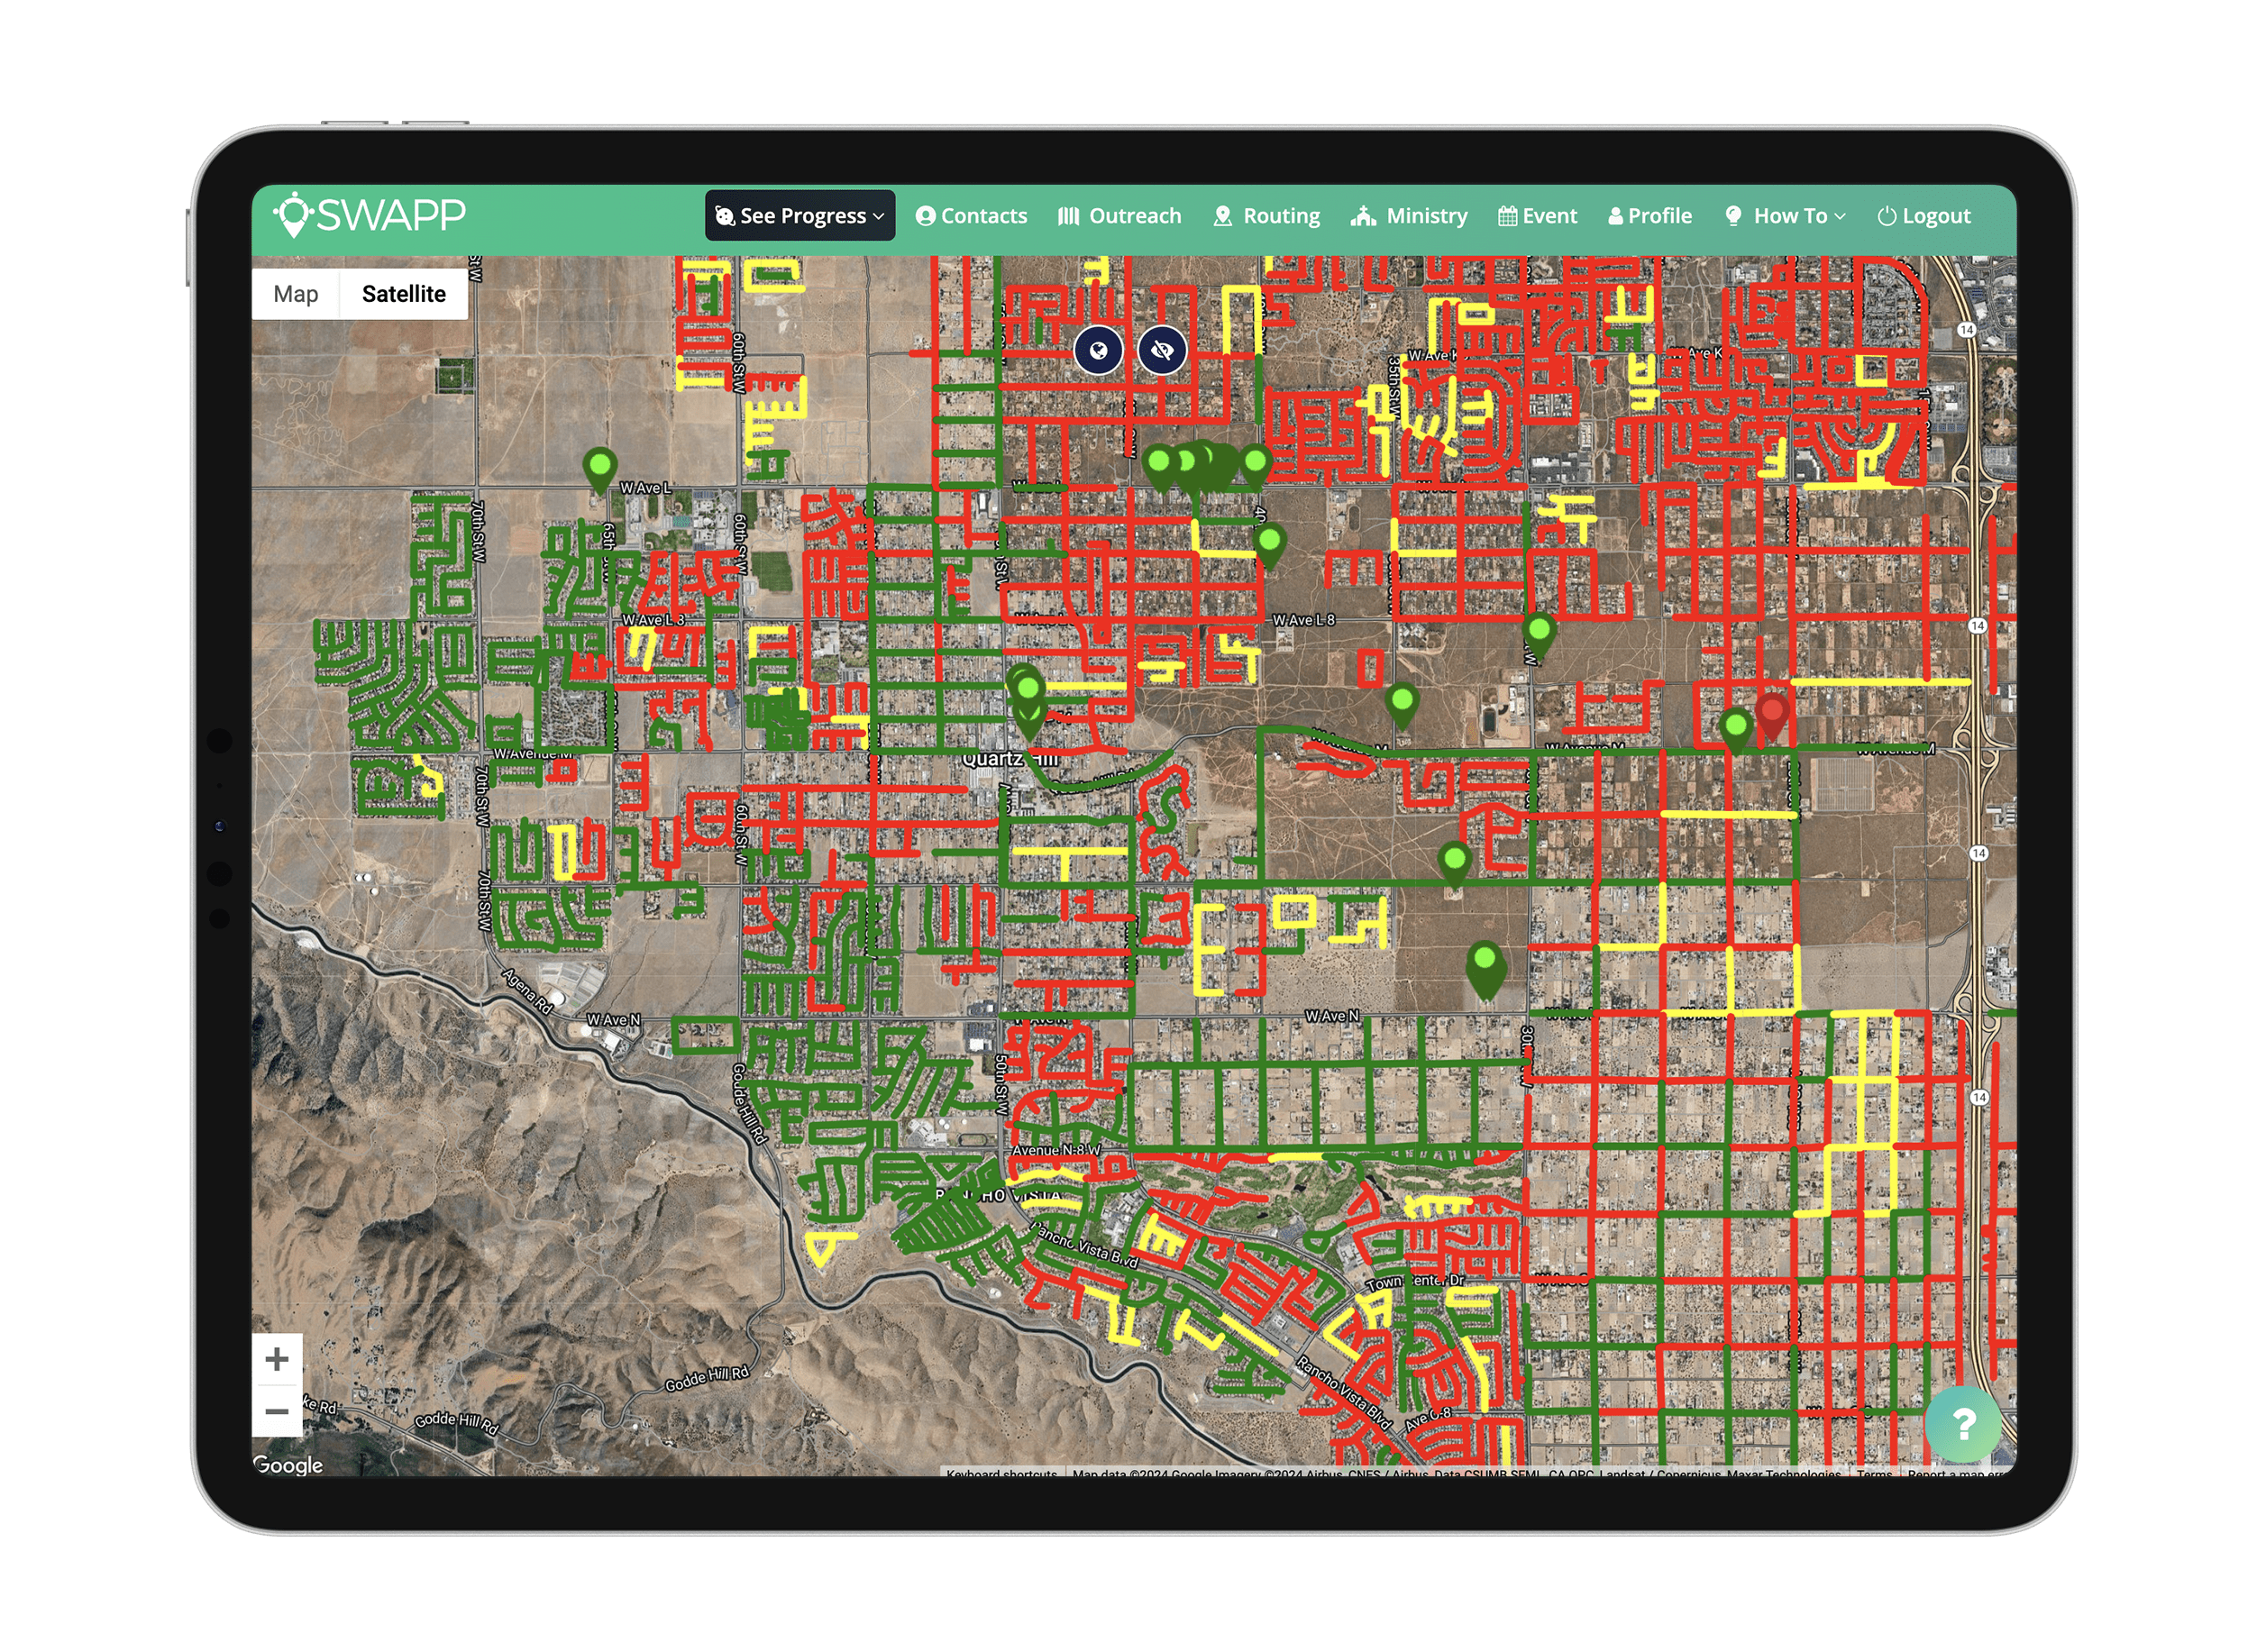
Mapping is a core feature of The Soulwinning App (SWAPP), empowering churches to plan and track their door-to-door outreach efforts effectively. In this updated guide, we'll walk you through the steps to create a map with the latest interface, explain how to edit boundaries, address recovery of deleted maps, and share tips for organizing maps into folders.
Guide to Create Outreach Maps
Creating a map in SWAPP is your first step to planning your church's outreach. Follow these updated steps to get started, reflecting the latest interface changes:
1. Log In and Navigate to the Outreach Tab
Log in to the web version of SWAPP at thesoulwinningapp.com with an admin account (see our FAQ on setting up admin access for more details). Once logged in, go to the Outreach tab in the admin dashboard. This is where you'll create and manage all your outreach areas.
2. Choose Your View: Map View or List View
In the Outreach tab, you'll see two ways to view your maps:
- Map View: Displays your folders and maps visually on a map interface (default view).
- List View: Shows your folders and maps in a list format, with a center column for individual maps.
You can switch between these views using the toggle button in the top-right corner. For creating maps, we recommend starting in Map View to visualize your areas better.
3. Enable Location Services or Search Manually
In Map View, if you allow the browser to access your location, SWAPP will automatically center the map on your current location. If you prefer not to enable location services, or need to map a different area, use the search bar at the top to enter an address (e.g., your church's address or a specific neighborhood). For better detail, switch to Satellite View by clicking the view toggle button, which helps you see streets and houses more clearly.
4. Create a Folder for Your Outreach Area
Click the Add a Folder button to start defining a new outreach area. Use the drawing tool to drop anchor points and outline the region you want to focus on (e.g., a section of your city like "North Little Rock").
- Drop anchor points by clicking on the map to create a polygon. For curved boundaries, add more points to follow the shape accurately.
- Name your folder (e.g., "North Little Rock").
- Choose a color for the folder using the new color selector (note: the selector's appearance varies by browser—Google Chrome may show a basic picker, while Safari offers a more user-friendly color wheel). For example, select a vibrant green.
- Click Save to create the folder. At first, the folder may appear red because it contains no maps; it will change to your chosen color (e.g., green) once maps are added or when maps are open.
5. Add Maps Within the Folder
Click on your newly created folder (e.g., "North Little Rock") to open it. You'll see new drawing tools, including Add a Map. Click Add a Map to start drawing a detailed map within the folder.
- Zoom in to focus on a specific street or area.
- Drop anchor points to outline the map (e.g., a single street or a small neighborhood). Double-click on the last anchor point to finish drawing.
- Name the map (e.g., "North Little Rock 1") and click Save. Repeat to add more maps (e.g., "North Little Rock 2", "North Little Rock 3").
How to Edit Map Boundaries After Creation
It's possible to edit map boundaries after they've been created. Here's how:
1. Access Your Map
In the Outreach tab, go to Map View or List View. In Map View, click on the folder containing the map (e.g., "North Little Rock"). In List View, select the folder from the left column to see its maps in the center column.
2. Select the Map to Edit
Find the map you want to modify (e.g., "North Little Rock 1") and click on it to open its details. In Map View, you'll see the map highlighted on the interface. In List View, click the map name to view its details.
3. Edit the Boundaries
Look for an Edit button or pencil icon next to the map (in Map View, this may appear when you hover over the map; in List View, it's in the map details). Click Edit to reopen the map interface.
- Drag existing anchor points to adjust the boundaries.
- Add or remove points to reshape the map as needed.
- Double-click to finish editing.
4. Save Changes
Click Save to update the map. Your team will now see the revised boundaries during outreach.
How to Recover Deleted Maps or Folders
Here's what you need to know about recovering deleted content:
- Current Limitation: SWAPP does not currently support undoing a map or folder deletion. Once a map or folder is deleted, it cannot be recovered directly within the app.
- Deleting a Folder: Deleting a folder does not delete the maps inside it—they are moved to the "All Outreach" list.
- Deleting a Map: Deleting a map from the "All Outreach" list in List View permanently removes it.
- Recreate the Map: If a map is permanently deleted, you'll need to recreate it by following the steps in the "Create a Map" section above.
- Contact Support: If a critical map or folder was deleted, reach out to our support team at tommy@theswapp.io or (616) 914-8392.
Tips for Organizing Church Outreach Maps into Folders in the Software
Organizing your maps into folders keeps your outreach efforts structured, especially if your church covers multiple areas. Here are some updated tips:
1. Create Folders for Different Areas
In the Outreach tab, use the Add a Folder button to create folders for different regions (e.g., "North Little Rock," "Northwest"). Folders can be color-coded to differentiate them and will turn red when all maps inside are completed.
2. Move or Copy Maps Between Folders
In List View, select a map (or multiple maps) and use the Move to Folder option to copy them to another folder. Note that this action copies the maps rather than moving them, so they'll exist in both folders.
3. Toggle Folder Visibility
In Map View, click the Edit Folder button (pencil icon) to access options like turning off folder visibility in the app. This hides the folder from team members, which is useful if you're preparing maps that aren't ready for use.
4. Use Descriptive Names and Colors
Name your folders and maps clearly (e.g., "North Little Rock 1") and use the color selector to visually distinguish folders.
Utilizing Maps in Outreach
Once your maps are created, here's how to use them effectively:
- Check In to a Map: In the mobile app, select a map, click View Street, and tap Check In to claim the map for outreach. This marks the map as yellow (pending) in the app.
- Add Contacts and Notes: While door-knocking, tap on a house to add a contact or note. These are visible to other team members checking into the same map.
- Check Out and Mark Complete: When finished, tap Check Out, enter the number of doors knocked, and the map will turn red (completed).
- Print Maps: In List View, select up to five maps and click Print to generate a PDF with map details, an address for navigation, and a QR code for app access.
Need More Help?
Mapping is a powerful tool for soulwinning, and we're here to ensure you can use it effectively. If you have questions or need assistance with the church outreach mapping software (SWAPP) contact our support team at tommy@theswapp.io or (616) 914-8392. Let's make your outreach efforts impactful!